Install Skulk
The packaged Skulk apps are the recommended way to install and operate Skulk. They give the runtime a stable application identity, include the matching dashboard and native components, and let you start, stop, inspect, and open a node without managing a source checkout or Python environment.
Choose the path that matches the machine:
| Machine | Recommended install |
|---|---|
| Apple Silicon Mac running macOS 15 or newer | Signed and notarized Skulk menu-bar app through a DMG or Homebrew |
Ubuntu or Debian desktop, amd64 or arm64 | Skulk app and runtime through the Foxlight APT repository |
Headless Ubuntu or Debian, amd64 or arm64 | Runtime-only APT package |
| Contributor workstation, development branch, or another Linux distribution | Source installer |
macOS
Download the pinned Skulk 1.5.1 signed and notarized app directly:
Download Skulk 1.5.1 for Apple Silicon (.dmg)
Open the DMG, drag Skulk to Applications, eject the DMG, and open Skulk from Applications. macOS verifies the Developer ID signature and stapled notarization ticket before launch.
Homebrew is an equally supported install and update channel:
brew install --cask Foxlight-Foundation/skulk/skulk
Skulk is a menu-bar app: it does not keep a window or Dock icon open. After
launch, click the Skulk fox in the macOS menu bar. The menu shows the node state
and provides Start Skulk, Stop Skulk, Open Dashboard, and
Reveal Runtime Log. The app includes the exact Skulk runtime and dashboard
built for its release, so you do not need to install or approve uv, Python,
Node.js, or a source tree.
First run on macOS
- Open Skulk from Applications. The menu initially reports Stopped; that is expected because V1 never joins a cluster until you choose to start.
- Click the Skulk menu-bar fox and choose Start Skulk.
- Approve macOS Local Network access. Skulk needs it to discover and communicate with nodes on your LAN. Skulk does not require Screen & System Audio Recording; deny that permission and report the app version if macOS ever presents it.
- Wait for the menu to report Ready, then choose Open Dashboard.
- Confirm that your Mac appears in the topology. A single Mac is a complete one-node cluster, so you can launch a model and chat before adding more machines.
To update later:
brew upgrade --cask Foxlight-Foundation/skulk/skulk
Skulk checks Foxlight's stable release manifest when the app starts and also offers Check for Updates… in the menu. When a newer stable version is available, Download version… opens its signed DMG. The app never silently downloads or replaces itself; Homebrew users can continue to update with the command above.
To uninstall:
brew uninstall --cask skulk
If you installed from the DMG, quit Skulk and move Skulk from Applications to the Trash.
Ubuntu and Debian
Install the Foxlight repository keyring, refresh APT, and install Skulk:
curl -fLO https://apt.foxlight.ai/foxlight-archive-keyring.deb
sudo apt install ./foxlight-archive-keyring.deb
sudo apt update
sudo apt install skulk
When sudo asks for your Linux login password, type it and press Enter. The
terminal deliberately shows no dots or other characters while you type.
The public keyring package contains only the repository's public signing key and APT source definition. The repository's private signing key is never distributed.
The skulk package installs both the desktop controller and the matching
runtime. Open Skulk from the application menu and select Start Skulk.
The app enables and starts the packaged skulk.service user unit, then gives
you controls for the dashboard, logs, node lifecycle, and cluster namespace.
Installing the package alone does not start the service without your action.
First run on Linux desktop
- Open Skulk from the application menu.
- Choose Start Skulk and wait for the status to report Ready.
- Choose Open Dashboard.
- Confirm that the local machine appears. One machine is a valid one-node cluster; add more machines only after this first node works.
The runtime package contains the exact reviewed Skulk source, locked Python environment, built dashboard, native bindings, launcher, and user service unit for that release. Linux inference engines are selected from the hardware Skulk detects; see the NVIDIA and AMD guides for hardware-specific preparation.
To update later:
sudo apt update
sudo apt install skulk
To uninstall the app and runtime:
sudo apt remove skulk skulk-desktop skulk-runtime
Headless Ubuntu or Debian
On a machine with no graphical session, install only the runtime after adding the repository above:
sudo apt install skulk-runtime
systemctl --user daemon-reload
systemctl --user enable --now skulk
A systemd user service normally runs only while that user has a session. For an unattended node that must survive logout, an administrator can enable lingering for the service account:
sudo loginctl enable-linger "$USER"
Form a cluster
- Get one node to Ready and confirm it in the dashboard.
- Install the same Skulk version on every additional machine.
- Start Skulk on each machine from the app or service manager.
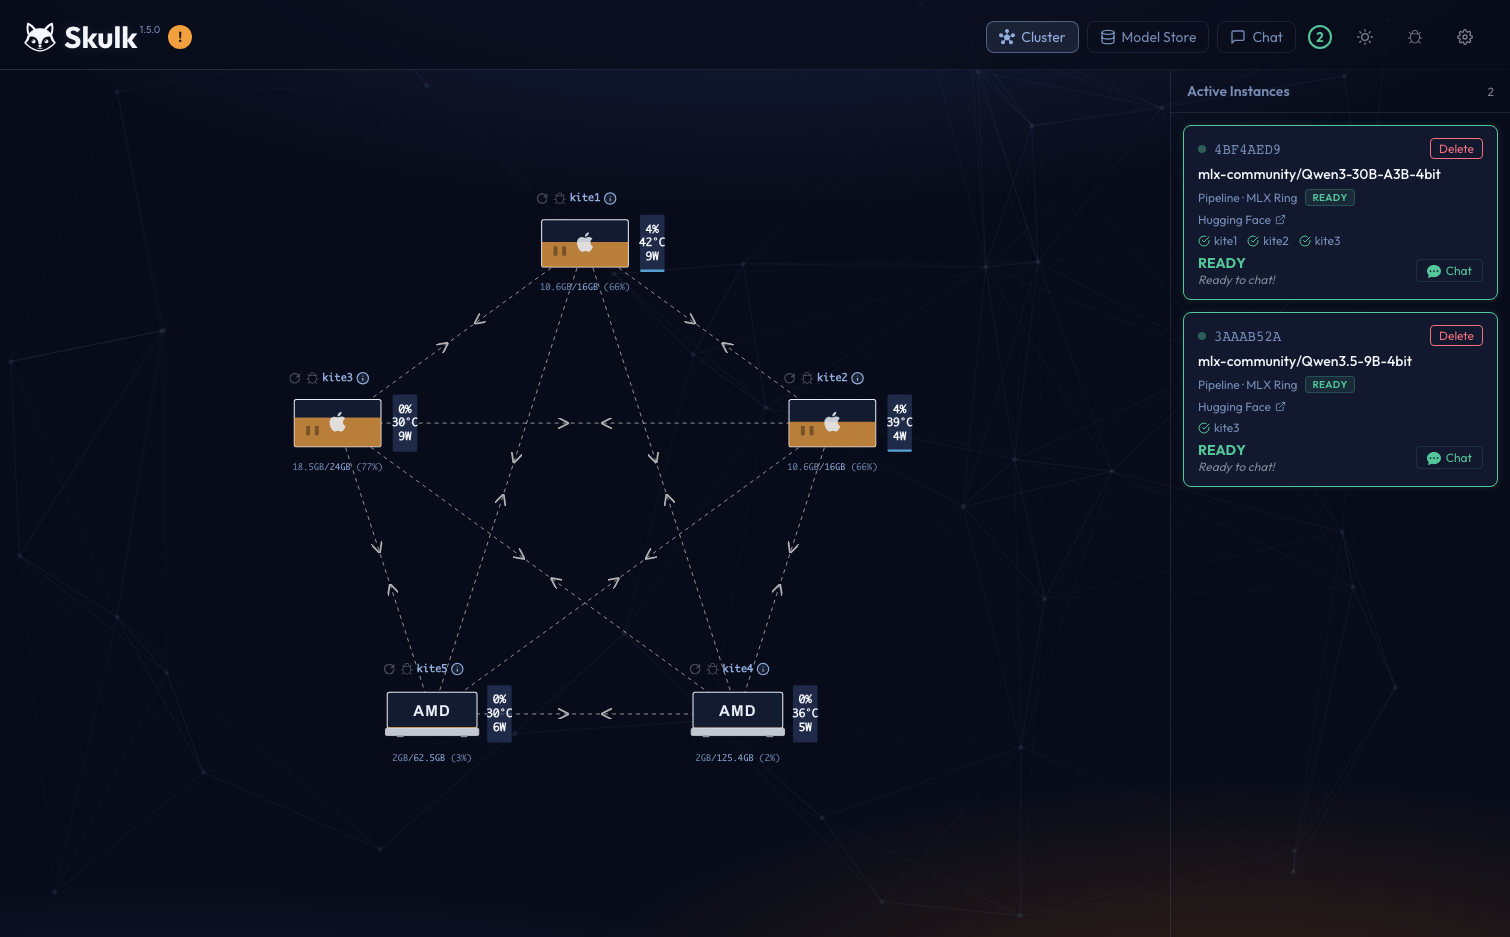
- Open the dashboard from any running node and confirm the machines appear in the topology.
- Pick and launch a model. Skulk places it on compatible hardware and begins serving when the placement is ready.
Nodes on the same network use Skulk's shared default namespace and discover one another automatically. You do not need to invent an identifier for an ordinary cluster. If multiple independent Skulk clusters share a network, set a custom namespace in the app on every node that should belong together. Nodes with different namespaces cannot form one cluster.
What success looks like
The dashboard first shows every connected node and its available memory. Start with one node, then add machines one at a time so a discovery or permission problem is easy to isolate.
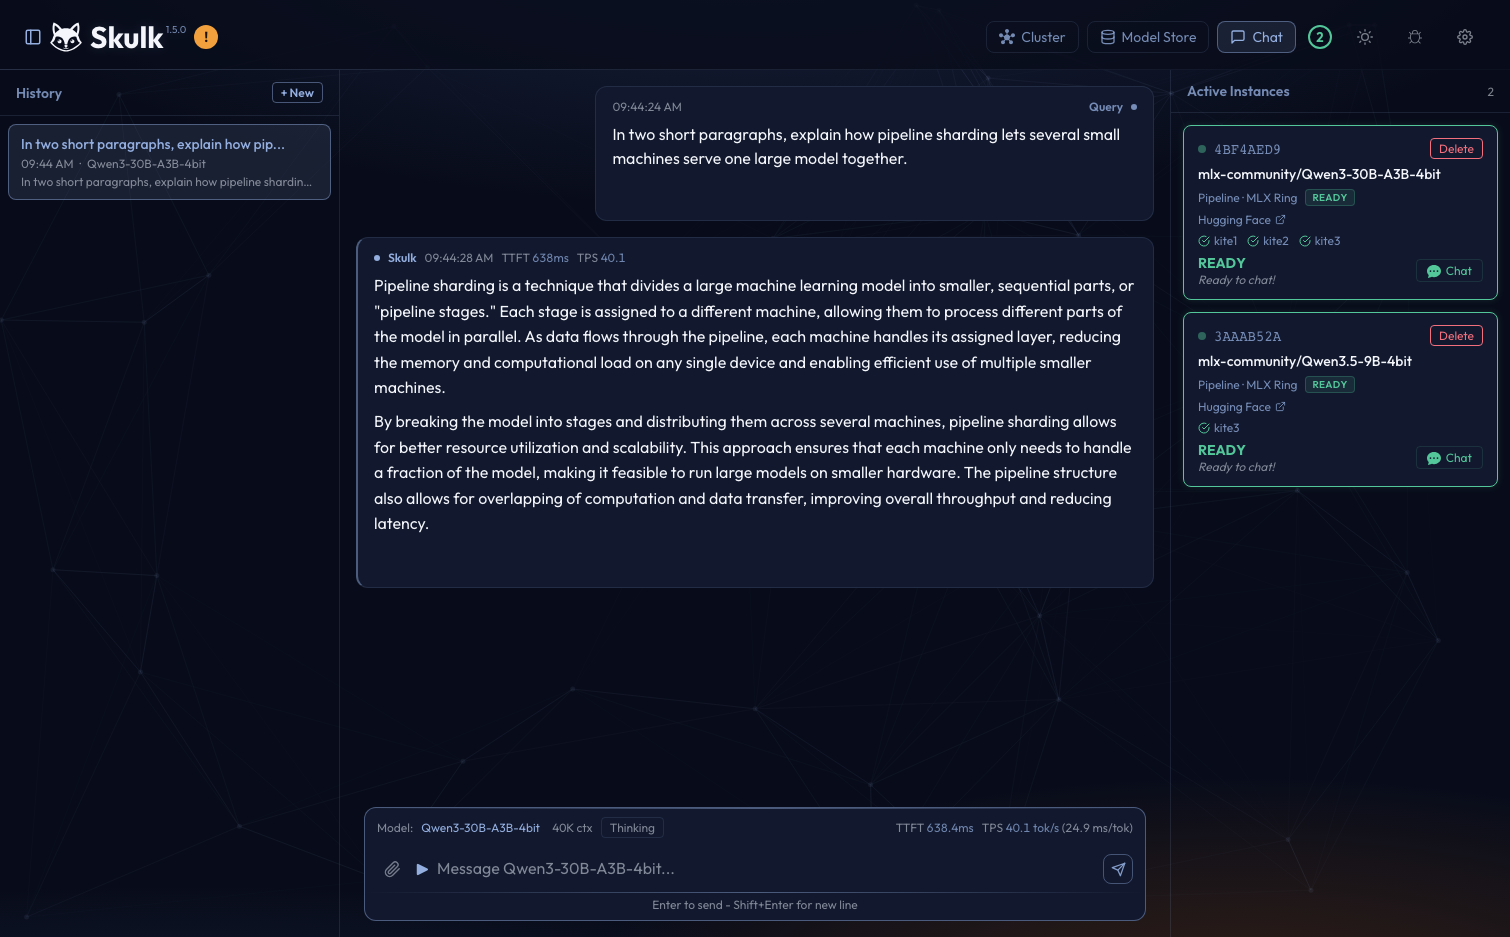
After a model reports ready, open Chat and send a short prompt. The response is generated by your own Skulk node or cluster.
First-run troubleshooting
| What you see | What to do |
|---|---|
| Skulk opened but no window appeared on macOS | Click the Skulk fox in the menu bar. A persistent Dock window is intentionally not shown. |
| The menu remains at Stopped on first launch | Choose Start Skulk. The initial startup is deliberately user-triggered. |
| The runtime does not reach Ready | Choose Reveal Runtime Log on macOS, or inspect journalctl --user -u skulk on Linux. |
| A second local node never appears | Confirm every node uses the same version and namespace. On macOS, enable System Settings → Privacy & Security → Local Network → Skulk, then stop and start Skulk. |
| macOS asks for Screen & System Audio Recording | Deny it. That permission is not part of the Skulk desktop contract. Include the app version when reporting the prompt. |
| The dashboard opens but shows only one node | That is a working one-node cluster. Start the other nodes, then troubleshoot discovery only if they do not join. |
sudo looks frozen while asking for a password | Type the Linux account password and press Enter; no typing feedback is shown. |
The macOS app does not start Skulk automatically at login. On Linux desktop, choosing Start Skulk enables the user service, so it normally starts again at later logins. Linux headless operators can explicitly enable the user service as described above.
Source and development installs
Use the source installer when you are contributing to Skulk, testing the development branch, installing on a Linux distribution that the packages do not cover, or need direct control over the source environment:
curl -fsSL https://raw.githubusercontent.com/Foxlight-Foundation/Skulk/main/install.sh | bash
The stable installer targets main. To install the development branch that
matches the /next/ documentation:
curl -fsSL https://raw.githubusercontent.com/Foxlight-Foundation/Skulk/main/install.sh | bash -s -- --ref dev
See Source builds and runtime paths for deterministic commit pins, manual setup, and the exact work performed by the installer.