Remote Access and Pairing
Skulk provides several ways to operate a cluster. Choose the connection that matches the client and the access your cluster owner has configured.
| Connection | Requirements | Intended use |
|---|---|---|
| Local dashboard | A browser that can reach a dashboard-serving node | Operate the cluster on its trusted network |
| Dashboard over Tailscale | The browser's device and node can reach each other through the authorized tailnet | Private remote browser access |
| Native operator app through the relay | A provisioned cluster gateway, relay service, and valid pairing | Remote iOS/Android access without a VPN on the phone |
| Paired browser session | The intended gateway served through HTTPS or localhost, an owner invitation, and appropriate grants | Scoped browser operations such as plugin management |
A browser session is not the native app's relay carrier. Browser pairing binds the tab to the gateway serving its page; it does not create an internet tunnel. Do not expose the unauthenticated local API listener directly to the internet.
Prepare remote access
A node registers its own relay route the first time you pair a phone: choose
Pair a phone under Settings → Devices & pairing, or run
skulk operator pair on a headless node. The node generates its own connector
key and carrier credentials, sends the relay only their fingerprints, and starts
remote access without a restart. Installing Skulk or opening Remote Access
alone does not contact the relay.
The node where you first pair a phone becomes the cluster's pairing gateway:
paired phones reach the cluster through it, so choose a machine that stays on.
Other nodes' dashboards say which node manages pairing instead of offering a
second, separate one, and skulk operator pair asks the node on its machine
(--api-port, default 52415) and refuses for the same reason. The cluster's
five-device limit is counted on that one gateway. There is no automatic
failover to another node.
The gateway registers with Foxlight's relay, relay.foxlight.ai, unless
skulk.yaml names another:
connectivity:
  relay:
    enabled: true                                  # false keeps pairing on LAN and Tailscale
    registration_url: https://relay.example.invalid  # optional; omit for relay.foxlight.ai
The relay is content-blind. It learns the connector key's fingerprint, the two credential fingerprints, the gateway's public address, connection times, and byte counts. It never sees app traffic, which stays inside TLS that terminates on the gateway.
To turn remote access off, choose Turn off in Devices &
pairing, or run skulk operator forget-relay. Phones paired through the relay
lose remote access until you pair them again, and codes created for the relay
stop working. Revoke the old device records to free their slots.
A self-hosted relay can supply a provisioning file instead:
skulk operator configure-relay --provisioning-file <file> stores that route
and its protected carrier credentials and generates the gateway's TLS
identity.
Use the dashboard's Remote Access view to find local LAN and Tailscale connection options. Relay health shows in Devices & pairing: connecting, connected, relay unreachable (check the machine's internet connection), or refused (turn phone pairing off, then pair a phone again). Keep provider and gateway secrets out of screenshots and support messages.
Create and revoke invitations
Open Settings → Devices & pairing on the pairing gateway from localhost or an authorized direct Tailscale connection. Ordinary LAN access and the public relay cannot administer pairing invitations.
Choose the validity period and allowed device count, then select Pair a phone. The first time, the node registers with the relay and connects before the code appears. The displayed code/QR is a bearer secret. Its on-screen visibility window is separate from the invitation's validity period: hiding the code does not revoke it. Review recent invitations and revoke any that should no longer admit devices. On the phone, choose Scan pairing code, allow camera access, and center the displayed QR code in the frame. Review the cluster identity before confirming. See the native app guide.
Invitation creation and revocation happen when their own controls are selected; they do not wait for the main Settings Save changes button.
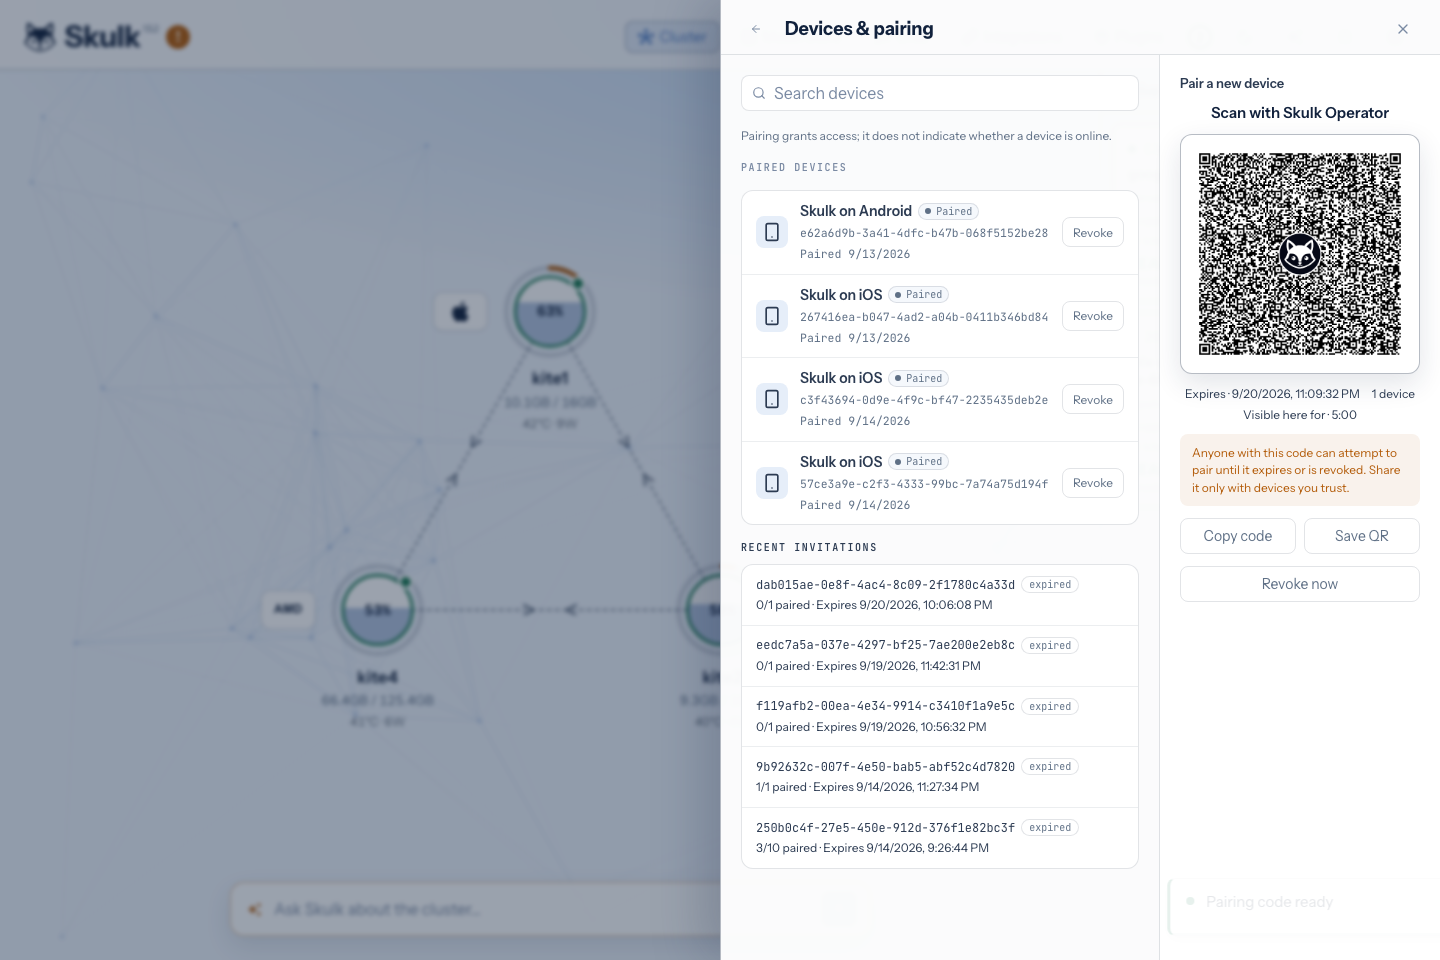
This invitation was revoked immediately after capture. The pictured code cannot pair a device; generate your own invitation in Settings.
An invitation admits pairing; the resulting device has its own identity and credentials. Revoking an invitation prevents further use of that invitation. To remove an already paired device, revoke the device itself. Device credentials use short-lived access tokens with refresh rotation; successful pairing does not grant every administrative permission.
Five paired devices per cluster
A cluster allows at most five paired devices at once. Devices & pairing
shows how many of the five slots are in use and offers only as many devices as
there are free slots. When all five are taken it stops generating codes, and a
phone that scans an older code is told the invitation is no longer available.
To pair another device, revoke one under Paired devices first. On a
headless host, skulk operator devices list shows the slots and
skulk operator devices revoke DEVICE_ID frees one.
A device whose app has not connected for 30 days no longer counts: its refresh credential expired, so it must pair again anyway. The dashboard marks it Expired; revoke it to tidy the list.
Pair a browser for plugin operations
From Plugins, open Browser access:
- Paste the owner's invitation and select Review invitation.
- Verify the cluster name, fingerprint, and gateway displayed by the page.
- Give the tab a recognizable name and select Pair this browser.
- Give the displayed device ID to the owner if additional plugin access is needed.
Credentials remain in tab memory and disappear on reload or disconnect. Pairing
does not automatically grant plugin privileges. The owner grants
plugins:read, plugins:manage, and plugins:approve separately. Read access,
configuration authority, and approval of a reviewed proposal are distinct
permissions. Publisher-trust and credential-destination setup remains a direct
owner operation even for a browser with plugin-management grants.
How the native relay path works
The designated operator gateway connects outward to the relay. The app connects to that relay and establishes a separate, pinned TLS connection through it to the cluster gateway. Application TLS terminates at the cluster, so the relay forwards encrypted bytes without reading prompts, answers, model names, commands, or canonical API bearer credentials.
Each request or stream has an independent connection lane. The on-demand connector keeps a control connection and opens bounded data lanes when requests arrive; the legacy provisioning format uses a bounded pool of waiting lanes. These are provisioning choices, not different model APIs.
The relay still handles connection-routing metadata and aggregate resource usage. Content encryption does not mean the relay sees no network metadata. The gateway enforces cluster authentication and route permissions after termination. If the designated gateway or relay is unavailable, remote app access is unavailable; local cluster operation can continue.
Troubleshooting
| Symptom | Check |
|---|---|
| Invitation generation is refused | Use the configured gateway through localhost or its authorized direct Tailscale connection |
| Pairing is refused | Check invitation expiry, the five-device limit (revoke a device to free a slot), revocation, and cluster identity; obtain a current invitation |
| App is paired but offline | Check gateway availability, relay configuration, and network connectivity; remembered identity is not live health |
| Browser loses access after reload | Pair the tab again; browser credentials intentionally stay in memory |
| Plugin controls are unavailable | Ask the owner to verify the exact plugin grants and manager readiness |
| An operation's response is uncertain | Observe its retained operation ID before trying another mutation; a disconnect is not proof that the operation failed |
For endpoint contracts, scopes, and response codes, see the API guide.